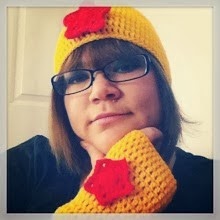
I wanted to make everyone close to me a handmade gift this year and I knew that my Mum likes 'flip-top' mittens so I set about making a pair. I got a free pattern from
Ravelry and some chunky beige wool (Sirdar Chunky with Wool) that I thought would go with everything.
I was going up to London on the train to see some comedy at
Bush Hall so I took my big handbag with yarn, pattern and hooks and blazed ahead. In the outward journey I had made one mitt and started on the top part. By the time I was on the way home I had realised that I didn't like the way that they were going. I think the yarn I chose was too chunky; they didn't sit right. So, I frogged the lot and started to wing it. This was the first time that I had made something without a pattern (except for my momiji couture contest entry) and I was a bit nervous.
But they turned out OK and Mum was happy (or at least she said she was!)
When I started making them I intended to appliqué some turquoise snowflakes onto them, but after leaving them laying around for a while I decided that the addition had to be hot pink because of a pashmina Mum had her eye on (she got that for Christmas, too). I didn't think that snowflakes would look right in pink, so Mr Badschnoodles suggested butterflies!
Here is the pattern by Crocheted Sass that I used for the
butterflies And the pattern for the mittens will follow after a few notes.

Firstly, please don't sell the pattern - it is for personal/gift use only.
Secondly, although I am English, I learned to crochet from an American book before I knew that there was a difference in terminology. I can follow UK terms, but the US ones come more naturally to me, and most of the patterns that I have followed from Ravelry and blogs have been in US terminology. This pattern is in US terms also.
Thirdly, this is a first attempt and hasn't been tested so if you try it and find any errors please let me know. And let me see some pictures, too!
Here's the pattern. If you want to print it you will need to copy and paste into a document programme. Or if you email me I can send it as an attachment.
Mum's MittensI used Sirdar Chunky with wool and a 6mm hook.
Stitches used
Ch – Chain
SS – Slip stitch
DC- double crochet
2DC – 2 DC in one stitch
FPDC – Front post double crochet
BLDC – Back loop double crochet
BSS – Backwards slip stitch
DC2T – Double crochet two stitches into one (to decrease yo, insert hook and pull up a loop, insert into next stitch and pull up a loop – 3 loops on hook. YO and pull through first 3 – 2 left on hook. Yo and pull through last stitch.
HDC – half double crochet
HDC2T – half double crochet 2 together
LEFT HANDR1 Ch 30 and join with SS. DC in each ch.
R2 Ch3 *FPDC in next DC, DC in next DC* repeat until end of round.
Join with SS
R3 Ch3 *FPDC in next DC, DC in next DC* repeat until end of round.
Join with SS
R4 Ch3 *FPDC in next DC, DC in next DC* repeat until end of round.
Join with SS
To make a longer cuff, extend here
R5 Ch3 BLDC around. Join with SS
R6 Ch3 DC around join with SS
R7 Ch3 2DC in 1st stitch. 27 DC. 2DC in next. SS to join.
R8 Ch3 2DC, 2DC, 27 DC, 2DC, 2DC SS to join
R9 Ch3 DC around join with SS
R10 BSSx5 Ch3 DC around. Ch2 and SS to 10th stitch from start of Ch3. The smaller hole will be the thumb hole.
R11 Ch3 DC around. 2 DC in Ch2 space.
R12 Ch3 DC around
R13-15 repeat R12.
R16 Ch3 12 DC. DC2T for next 2. DC to finish and SS to join.
R17 Ch3 10 DC, DC2T, 2 DC, DC2T, DC to end SS to join.
R18 Ch3 DC, DC2T, 5 DC, 4 DC2T, 6 DC, DC2T, DC, SS to join.
R19 Ch3 DC2T around, SS to join.
R20 Ch2 HDC2T around SS to join
R21 SS to close.
THUMB HOLEAttach yarn to one stitch with a SS
R1 Ch3 DC around with 2DC in the spaces between the CH2 from R11.
R2 Ch3 DC around, SS to join
R3 Ch3 DC around. DC2T at the point where your thumb pad will be (depends on where you started from)
R4 Ch2 HDC2T around. Finish off. (You can ch1 and SS to opposite side if desired)
RIGHT HANDR1 Ch 30 and join with SS. DC in each ch.
R2 Ch3 *FPDC in next DC, DC in next DC* repeat until end of round.
Join with SS
R3 Ch3 *FPDC in next DC, DC in next DC* repeat until end of round.
Join with SS
R4 Ch3 *FPDC in next DC, DC in next DC* repeat until end of round.
Join with SS
To make a longer cuff, extend here
R5 Ch3 BLDC around. Join with SS
R6 Ch3 DC around join with SS
R7 Ch3 2DC in 1st stitch. 27 DC. 2DC in next. SS to join.
R8 Ch3 2DC, 2DC, 27 DC, 2DC, 2DC SS to join
R9 Ch3 DC around join with SS
R10 5 SS, DC around, SS to 10 stitches back (from last of 5 SS)
R11 Ch3 2DC in Ch2 space from R10 DC around SS to join
R12 Ch3 DC around
R13-15 repeat R12.
R16 Ch3 16 DC DC2T for next 2.DC to finish and SS to join.
R17 Ch3 2 DC2T, 10DC, 2 dc2t, DC, DC2T, DC to finish, SS to join
R18 Ch3 DC2T, DC, 2 DC2T, 5DC, 4DC2T, DC to finish, SS to join.
R19 Ch3 DC2T around, SS to join.
R20 Ch2 HDC2T around SS to join
R21 SS to close.
THUMB HOLEAttach yarn to one stitch with a SS
R1 Ch3 DC around with 2DC in the spaces between the CH2 from R11.
R2 Ch3 DC around, SS to join
R3 Ch3 DC around. DC2T at the point where your thumb pad will be (depends on where you started from)
R4 Ch2 HDC2T around. Finish off. (You can ch1 and SS to opposite side if desired)

That's it! Any questions or comments welcome - especially about the way that I have written out the pattern - if there is anything unclear please let me know.
Happy Hooking!